Claude Code Hooks: Event-basierte Automatisierung

Inhalt
Hooks sind das Enforcement-Feature in Claude Code. Während CLAUDE.md Empfehlungen gibt, garantieren Hooks, dass bestimmte Aktionen immer passieren - Auto-Formatting, Security-Checks, Tests.
Was sind Hooks?
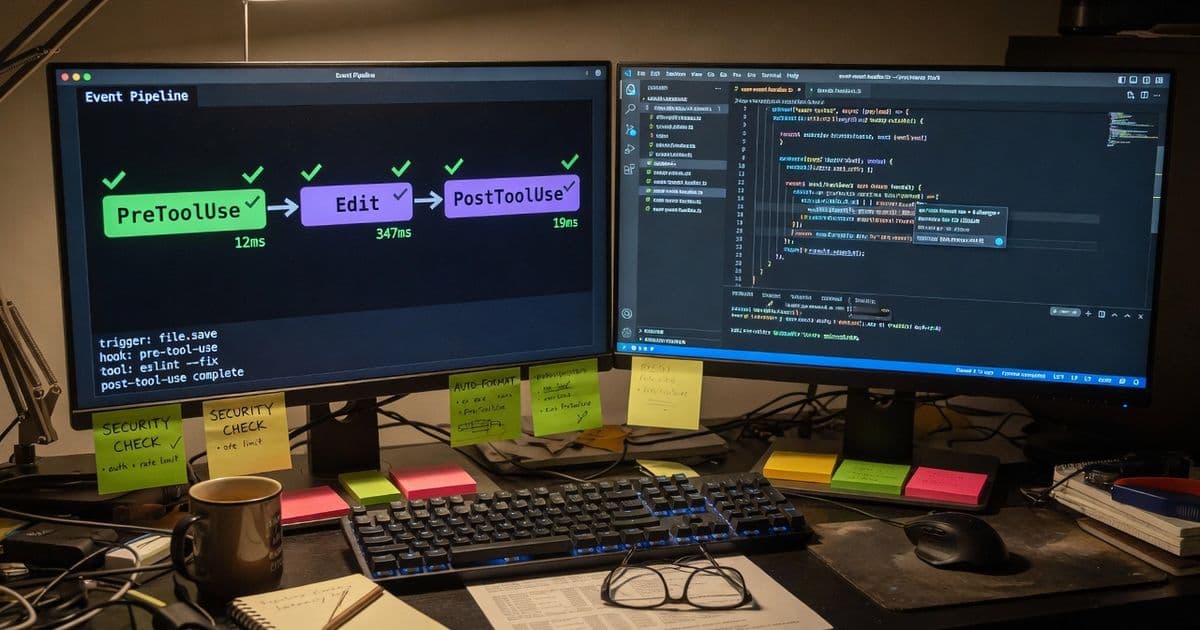
Ein Hook ist ein Script oder Command, das bei einem bestimmten Event automatisch ausgeführt wird:
[Claude will Datei editieren]
        ↓
[PreToolUse Hook: Security Check]
        ↓
[Check OK → Edit wird ausgeführt]
        ↓
[PostToolUse Hook: Auto-Format]
        ↓
[Formatierte Datei gespeichert]
Der Unterschied zu CLAUDE.md:
| CLAUDE.md | Hooks |
|---|---|
| "Bitte formatiere nach dem Edit" | Formatierung passiert garantiert |
| Advisory | Deterministic |
| Claude kann vergessen | System führt aus |
Wichtigste Hook-Events
Die folgende Übersicht deckt die gebräuchlichsten Events ab – die vollständige, aktuelle Liste finden Sie in der Claude-Code-Dokumentation.
Session-Events
| Event | Wann | Typische Nutzung |
|---|---|---|
SessionStart | Session beginnt | Env-Setup, Logging |
SessionEnd | Session endet | Cleanup, Reporting |
User-Events
| Event | Wann | Typische Nutzung |
|---|---|---|
UserPromptSubmit | User sendet Prompt | Input-Validierung, Logging |
Tool-Events
| Event | Wann | Typische Nutzung |
|---|---|---|
PreToolUse | Vor Tool-Ausführung | Validierung, Blocking, Modifikation |
PostToolUse | Nach erfolgreicher Ausführung | Formatting, Testing, Notifications |
PostToolUseFailure | Nach fehlgeschlagener Ausführung | Error-Logging, Alerts |
PermissionRequest | Bei Permission-Dialog | Auto-Accept/Deny Logik |
Agent-Events
| Event | Wann | Typische Nutzung |
|---|---|---|
SubagentStart | Subagent wird gestartet | Logging, Context-Setup |
SubagentStop | Subagent ist fertig | Validierung, Cleanup |
Stop | Claude ist fertig | Finale Checks, Notifications |
System-Events
| Event | Wann | Typische Nutzung |
|---|---|---|
PreCompact | Vor Context-Komprimierung | State-Saving |
Notification | Claude sendet Notification | Custom Alerts |
Konfiguration
Locations
Hooks können an verschiedenen Stellen konfiguriert werden:
| Location | Datei | Scope |
|---|---|---|
| User | ~/.claude/settings.json | Alle Projekte |
| Project | .claude/settings.json | Dieses Projekt (committen) |
| Local | .claude/settings.local.json | Persönlich (nicht committen) |
Grundstruktur
{
  "hooks": {
    "EventName": [
      {
        "matcher": "ToolPattern",
        "hooks": [
          {
            "type": "command",
            "command": "your-script.sh",
            "timeout": 60
          }
        ]
      }
    ]
  }
}
Matcher Patterns
| Pattern | Bedeutung |
|---|---|
"Write" | Exakt das Write-Tool |
"Edit|Write" | Edit ODER Write |
"Notebook.*" | Alle Notebook-Tools |
"*" | Alle Tools |
Exit-Code Verhalten
Der Exit-Code Ihres Scripts bestimmt, was passiert:
| Exit Code | Verhalten |
|---|---|
| 0 | Erfolg. stdout wird im Verbose-Mode angezeigt. Bei PreToolUse bedeutet Exit 0 nicht automatisch "allow" – die normale Permission-Logik gilt weiter, sofern Sie nicht per JSON permissionDecision setzen |
| 2 | Blocking Error auf Events, die Blocking unterstützen (z.B. PreToolUse). stderr wird an Claude zurückgegeben |
| Andere | Non-blocking Error. stderr im Verbose-Mode |
Exit Code 2 ist der Schlüssel zum Blockieren – aber nur bei Events mit Blocking-Support. So verhindern Sie z.B. Writes auf kritische Dateien:
#!/bin/bash
# .claude/hooks/protect-production.sh
# Hook-Input kommt als JSON über stdin

FILE_PATH=$(jq -r '.tool_input.file_path // empty')

if [[ "$FILE_PATH" == *"production"* ]]; then
    echo "BLOCKED: Production files sind geschützt!" >&2
    exit 2
fi

exit 0
PreToolUse: Aktionen kontrollieren
Einfaches Blocking
{
  "hooks": {
    "PreToolUse": [
      {
        "matcher": "Edit|Write",
        "hooks": [
          {
            "type": "command",
            "command": ".claude/hooks/protect-paths.sh"
          }
        ]
      }
    ]
  }
}
Script .claude/hooks/protect-paths.sh:
#!/bin/bash
# Tool-Input als JSON über stdin lesen

FILE_PATH=$(jq -r '.tool_input.file_path // empty')

PROTECTED_PATHS=(
    ".env"
    "credentials"
    "secrets"
    "production.config"
)

for pattern in "${PROTECTED_PATHS[@]}"; do
    if [[ "$FILE_PATH" == *"$pattern"* ]]; then
        echo "BLOCKED: $FILE_PATH ist geschützt!" >&2
        exit 2
    fi
done

exit 0
JSON-Output für erweiterte Kontrolle
PreToolUse Hooks können JSON zurückgeben für feinere Kontrolle:
{
  "hookSpecificOutput": {
    "hookEventName": "PreToolUse",
    "permissionDecision": "allow",
    "permissionDecisionReason": "Docs-Datei auto-approved",
    "updatedInput": {
      "file_path": "/corrected/path/file.ts"
    },
    "additionalContext": "Hinweis: Dies ist eine Docs-Datei."
  }
}
| Feld | Werte | Beschreibung |
|---|---|---|
permissionDecision | allow, deny, ask | Automatische Entscheidung |
permissionDecisionReason | String | Grund für die Entscheidung |
updatedInput | Object | Modifizierte Tool-Parameter |
additionalContext | String | Extra-Info für Claude |
Beispiel: Auto-Approve für Docs
#!/bin/bash
# .claude/hooks/auto-approve-docs.sh

FILE_PATH=$(jq -r '.tool_input.file_path // empty')

if [[ "$FILE_PATH" == *.md ]] || [[ "$FILE_PATH" == *"/docs/"* ]]; then
    cat << EOF
{
  "hookSpecificOutput": {
    "hookEventName": "PreToolUse",
    "permissionDecision": "allow",
    "permissionDecisionReason": "Documentation auto-approved"
  }
}
EOF
fi

exit 0
PostToolUse: Nach Aktionen reagieren
Auto-Formatting
{
  "hooks": {
    "PostToolUse": [
      {
        "matcher": "Edit|Write",
        "hooks": [
          {
            "type": "command",
            "command": ".claude/hooks/auto-format.sh"
          }
        ]
      }
    ]
  }
}
Script:
#!/bin/bash
# .claude/hooks/auto-format.sh

FILE_PATH=$(jq -r '.tool_input.file_path // empty')
[ -z "$FILE_PATH" ] && exit 0

case "$FILE_PATH" in
    *.ts|*.tsx|*.js|*.jsx)
        npx prettier --write "$FILE_PATH" 2>/dev/null
        ;;
    *.py)
        black "$FILE_PATH" 2>/dev/null
        ;;
    *.go)
        gofmt -w "$FILE_PATH" 2>/dev/null
        ;;
esac

exit 0
Auto-Testing
#!/bin/bash
# .claude/hooks/auto-test.sh

FILE_PATH=$(jq -r '.tool_input.file_path // empty')
[ -z "$FILE_PATH" ] && exit 0

# Finde zugehörige Test-Datei
TEST_FILE="${FILE_PATH%.ts}.test.ts"

if [[ -f "$TEST_FILE" ]]; then
    npm test -- "$TEST_FILE" --passWithNoTests 2>&1
fi

exit 0
Prompt-based Hooks
Für Stop und SubagentStop Events können Sie LLM-basierte Hooks nutzen:
{
  "hooks": {
    "Stop": [
      {
        "hooks": [
          {
            "type": "prompt",
            "prompt": "Prüfe ob alle Aufgaben erledigt sind: $ARGUMENTS",
            "timeout": 30
          }
        ]
      }
    ]
  }
}
Das LLM (Haiku) evaluiert und gibt zurück:
{
  "ok": true,
  "reason": "Alle Tasks wurden erfolgreich abgeschlossen."
}
Oder bei Problemen:
{
  "ok": false,
  "reason": "Tests wurden nicht ausgeführt."
}
Environment Variables und stdin-JSON
Hooks erhalten Session-Kontext über Umgebungsvariablen und Tool-Details als JSON über stdin:
| Variable | Beschreibung |
|---|---|
CLAUDE_PROJECT_DIR | Absoluter Pfad zum Projekt-Root |
CLAUDE_CODE_REMOTE | true wenn Remote/Web-Session |
CLAUDE_ENV_FILE | (SessionStart) Pfad für persistente Env-Vars |
Tool-Input über stdin (nicht als Env-Vars)
FILE_PATH, COMMAND und ähnliche Felder sind keine Umgebungsvariablen. Der Hook liest sie aus dem JSON auf stdin, z.B.:
FILE_PATH=$(jq -r '.tool_input.file_path // empty')
COMMAND=$(jq -r '.tool_input.command // empty')
Typische Felder unter tool_input je nach Tool:
- Edit/Write:
file_path– Pfad zur bearbeiteten Datei - Bash:
command– ausgeführter Befehl
Praktische Hook-Sammlung
1. Branch Protection
#!/bin/bash
# Verhindere Commits auf main/master

BRANCH=$(git branch --show-current)

if [[ "$BRANCH" == "main" || "$BRANCH" == "master" ]]; then
    echo "BLOCKED: Direkte Commits auf $BRANCH nicht erlaubt!" >&2
    exit 2
fi

exit 0
2. Commit Message Validation
#!/bin/bash
# Prüfe Conventional Commits Format

MESSAGE="$1"
PATTERN="^(feat|fix|docs|style|refactor|test|chore)(\(.+\))?: .{1,50}"

if ! [[ "$MESSAGE" =~ $PATTERN ]]; then
    echo "BLOCKED: Commit Message muss Conventional Commits Format folgen!" >&2
    echo "Format: type(scope): description" >&2
    exit 2
fi

exit 0
3. Security Scanning
#!/bin/bash
# Scanne auf Secrets

FILE_PATH=$(jq -r '.tool_input.file_path // empty')
[ -z "$FILE_PATH" ] && exit 0

if grep -E "PRIVATE_KEY|API_KEY|SECRET" "$FILE_PATH" 2>/dev/null; then
    echo "WARNING: Mögliche Secrets gefunden in $FILE_PATH" >&2
    # exit 2  # Uncomment um zu blockieren
fi

exit 0
4. Dependency Check
#!/bin/bash
# Prüfe auf bekannte Vulnerabilities nach package.json Änderung

FILE_PATH=$(jq -r '.tool_input.file_path // empty')

if [[ "$FILE_PATH" == *"package.json"* ]]; then
    npm audit --audit-level=high 2>&1
    if [[ $? -ne 0 ]]; then
        echo "WARNING: npm audit hat Vulnerabilities gefunden" >&2
    fi
fi

exit 0
5. Documentation Reminder
#!/bin/bash
# Erinnere an Docs-Updates bei API-Änderungen

FILE_PATH=$(jq -r '.tool_input.file_path // empty')

if [[ "$FILE_PATH" == *"/api/"* ]]; then
    echo "REMINDER: API geändert - bitte auch Docs aktualisieren" >&2
fi

exit 0
Debugging Hooks
Verbose Mode
claude --verbose
Zeigt stdout aller Hooks (auch bei Exit 0).
Logging in Hooks
#!/bin/bash
# Logging zu File

FILE_PATH=$(jq -r '.tool_input.file_path // empty')
LOG_FILE="$CLAUDE_PROJECT_DIR/.claude/hooks.log"
echo "[$(date)] Hook ausgeführt: $0" >> "$LOG_FILE"
echo "  FILE_PATH: $FILE_PATH" >> "$LOG_FILE"
Häufige Fehler
| Problem | Lösung |
|---|---|
| Hook wird nicht ausgeführt | Pfad prüfen, chmod +x |
| Exit 2 blockiert nicht | stderr nutzen; nur Events mit Blocking-Support (z.B. PreToolUse) |
| Tool-Felder leer | JSON von stdin parsen (jq), nicht auf Env-Vars wie $FILE_PATH warten |
| Timeout | timeout Feld erhöhen |
Best Practices
1. Schnelle Hooks
Hooks sollten schnell sein (< 5 Sekunden). Lange Hooks blockieren den Workflow.
2. Fail-Safe
#!/bin/bash
# Nicht blockieren bei eigenem Fehler

FILE_PATH=$(jq -r '.tool_input.file_path // empty')
[ -z "$FILE_PATH" ] && exit 0

if ! command -v prettier &> /dev/null; then
    # Prettier nicht installiert - nicht blockieren
    exit 0
fi

prettier --write "$FILE_PATH"
3. Klare Fehlermeldungen
echo "BLOCKED: .env Dateien dürfen nicht committet werden!" >&2
echo "Hinweis: Nutze .env.example als Template" >&2
exit 2
4. Dokumentation
Dokumentieren Sie Ihre Hooks für das Team:
## Konfigurierte Hooks

| Event | Hook | Zweck |
|-------|------|-------|
| PreToolUse (Edit) | protect-paths.sh | Schützt kritische Dateien |
| PostToolUse (Edit) | auto-format.sh | Formatiert Code |
| Stop | verify-tests.sh | Prüft Test-Coverage |
Fazit
Hooks transformieren "sollte" in "muss". Auto-Formatting, Security-Checks, Test-Execution - was früher Disziplin erforderte, passiert jetzt automatisch.
Starten Sie mit einem einfachen PostToolUse Hook für Formatting. Wenn Sie den Workflow verinnerlicht haben, erweitern Sie auf Security und Testing.
Weiterführende Artikel:
- Claude Code: Der komplette Überblick - Alle Features
- Claude Code Skills erstellen - Wiederverwendbare Workflows
- Claude Code Agents verstehen - Sub-Agenten
- CLAUDE.md Best Practices - Projekt-Konfiguration
Sie möchten Hooks für Ihr CI/CD-Setup entwickeln? Hedinger-Digital unterstützt bei Konzeption und Implementierung - Prozessautomatisierung bei Hedinger-Digital. Für die übergeordnete Frage, wo KI in Ihren Abläufen ansetzen soll, gibt es die KI-Beratung für KMU.
Häufige Fragen
Was sind Claude Code Hooks?
Hooks sind Scripts oder Commands, die automatisch bei bestimmten Events ausgeführt werden - z.B. vor einer Dateiänderung (PreToolUse) oder nachdem Claude fertig ist (Stop). Sie garantieren, dass bestimmte Aktionen immer passieren.
Was ist der Unterschied zwischen Hooks und CLAUDE.md?
CLAUDE.md enthält Empfehlungen, die Claude befolgen sollte. Hooks sind deterministisch - sie werden garantiert ausgeführt. Nutzen Sie CLAUDE.md für 'sollte', Hooks für 'muss'.
Welche Hook-Events gibt es?
Die wichtigsten: PreToolUse (vor Tool-Nutzung), PostToolUse (nach Tool-Nutzung), Stop (wenn Claude fertig ist), SessionStart/SessionEnd, UserPromptSubmit, SubagentStart/SubagentStop.
Wie blockiere ich gefährliche Aktionen mit Hooks?
Nutzen Sie PreToolUse mit Exit-Code 2 auf Events, die Blocking unterstützen. Das Script beendet mit Code 2 und schreibt die Fehlermeldung nach stderr – Claude erhält sie und die Aktion wird blockiert. Exit 0 bei PreToolUse bedeutet Erfolg, nicht automatisch 'allow'.
Kann ich Hooks nur für bestimmte Tools konfigurieren?
Ja, mit dem 'matcher' Feld. Sie können exakte Tool-Namen ('Write'), Regex-Patterns ('Edit|Write') oder Wildcards ('*') verwenden, um Hooks auf bestimmte Tools zu beschränken.